
Megadrive modding
I got my hands on a Sega Megadrive 2 about a month ago. As it came with nothing else than a single controller, I had to “fill in the blanks”. PSU and RGB cable were a must at least, but figured I’ll mod it while I’m at it.
Initial maintenance/repairs
The motherboard and case interior were covered with something greasy so I washed the board with some PCB cleaning liquid and dried it carefully with compressed air. Several washes were needed because grease stuck under the ICs started coming out only when drying the board.  After that I replaced the missing case fastening screws and resoldered all connector solder pads (some had visible cracks). Reset switch measured around 6kOhm when pressed; probably not working really well so better replace that one as well. The new switch was slightly taller than the original, so I had to file it shorter.
Powah!
First up, the power supply. The console came with nothing else than a single controller so I needed to figure out a PSU. The one that comes with MD2 is spec’ed @ 10V/850mA positive tip whereas I, on the other hand, have plenty of 9V/1.2A negative tip PSUs in use with other systems (game consoles/synths). Hence, I’d rather stick with the latter as this allows me to swap PSUs between devices more easily.
As the first version of the console (Genesis/MD1) came with a +9V PSU, I think it’s safe to assume that the design hasn’t changed that much PSU-wise. Going for a different PSU moreover seems like a simple ploy to force end users buying a Sega-branded “special PSU” in case the one shipped with the console breaks. Just to verify this by some readings, I tested the console (no game cart inserted) with a lab power supply on both 10V and 9V. The power consumption difference was only 20mA or so (values around 260 and 280 respectively). So 9V it is then!
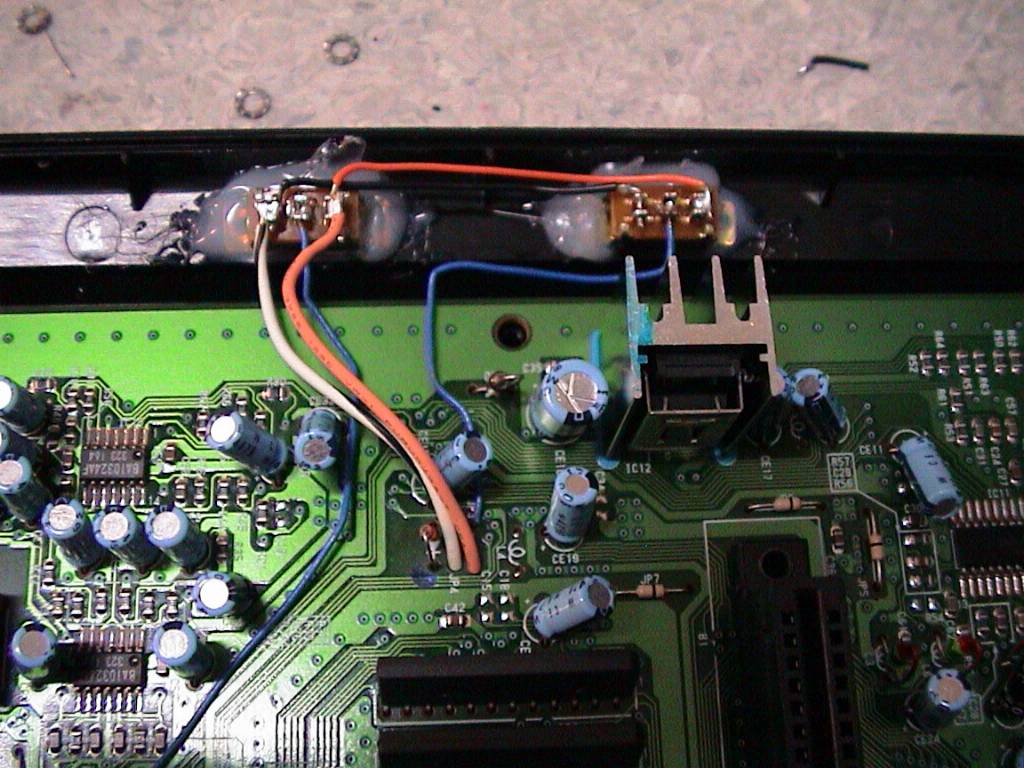
 Reversing the polarity was a doddle since there are the series EMI filters FB4 and FB5 installed right after the connector.
The connector on the 9V PSU is slightly bigger than the original one so had to replace the MD2 connector too. Unfortunately, the replacement connector I had had a slightly different pin size/placement so I had to cut down the pins and patch GND with a length of wire. Not necessarily the sturdiest way to mount a connector..
 Anyway, after completing the mod I tested the motherboard with a lab supply again and the power consumption went up to 300mA.. (wonder where that extra 20 or so is going?). No part heating up excessively and 20mA is not that big a raise anyway, so I’ll just ignore it.
JAP/NTSC & 50/60Hz switching
The process of installing these switches is described in-detail at Mmmonkey’s website here, so I’ll skip the details. Pretty straightforward.. For the JAP/NTSC-switch I adapted my mod so that I just scraped some off the green paint off the board and cut the foil near the teardrop on the upper side of the motherboard. Don’t like bending pins of custom chips ;)


Composite out mod
More of a kludge than a mod really, this was just something quick-to-implement that allowed me to hook up the system until got the rgb scart-cable sorted out.. So, wired a 3pin RCA-terminal directly to the AV-out connector pins.

RGB cable
Mmmonkey to the rescue, no additional photos required. I ordered a fully connected RGB cable and two 9-pin mini-din connectors, cut the cable in half and soldered in the connectors. Sold the other RGB cable away to make up for the money spent, as in “free RGB cable for me”. \:D/
Finishing up
As the Megadrive is of european version, the cartridge slot needed to be cut in order for the US carts to fit in at all. Once again, check Mmmonkey for a few pictures. A bit of careful cutting with a small hobby knife and filing to clean up the edges.
I chose to mount the 50/60Hz and JAP/ENG switches with hot glue instead of drilling excess holes. As the switches won’t be in heavy use, whatever mileage they have should be quite enough. Nonetheless, replacing them shouldn’t be much of a task even despite the glue needs to be removed first.


And that’s about it. Thanks to Sauli / Jumalauta for trading the MD2 <3 <3


What are you using for the labels?
These were done with a Zebra heat transfer printer.