
Eurorack Monster Base, design
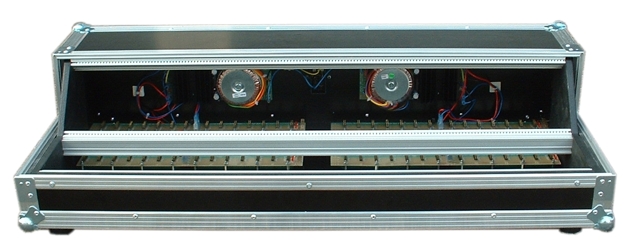
Shortly after completing my TTSH build I started longing for some added functionality, as in having more function modules to patch sounds with. I then got into eurorack modular synthesizers, cobbled together a small desktop case (photo below) to house some modules in, and ran out of space shortly after. I have heard this is a very common story among modular synthesizer hobbyists ;)..
Oh well, looks like I’m about to design & build a bigger eurorack case!!

My first 3U 84hp eurorack skiff..
I’m going to babble about design backgrounds and such in the next two paragraphs, so if you came here looking for the actual design bits feel free to skip to ‘Build Features’.
Research
To get started somewhere with the build, I decided to look into what kind of commercial and DIY alternatives are on the market. This put me on the map about the main types of cases, the pros and cons of each of them and helped figuring out what features I’d like mine to have.
Summing up the variety of case types, size-wise I’d split them into to three main categories..:
- Small desktop cases. 84hp or 104hp wide and 3U tall.
- Medium desktop and rack cases. Latter being mountable to standard 19″ rack. 84hp wide and mostly 3U to 9U tall.
- Large desktop cases, often simple wooden boxes of varying size. 84, 104, 168 or 200hp wide and 6U to 12U tall. Can be stacked on top of one another to form the classic “wall of synthesizers”.
Looking at pros and cons by size, the small cases are obviously good for mobile use as you can fit one in a (slightly larger than the average) backpack. They can’t fit many modules though and the more you need, each will of course add to build efforts and/or costs (each needs a power supply etc.). Medium size cases can be almost equally portable (eg. a modified suitcase) but can be a bit cheaper as you get more space for (almost) the same buck. Although if doing a medium-size rack case you also need a rack to put the case into and this will, provided you don’t have one, run some extra buck$$. Finally for large cases, you get the most module space for lesser costs but the case will be light years from portable.
Just to set a few quick examples, you could build a medium-sized desktop case by getting some sort of generic aluminium flight case off Ebay and the Doepfer A100 DIY kit off Thomann and following this Instructable by mploj. This would get you a 6U / 84hp (168hp total) sized portable case for slightly under 200€.
Or opting for a assembled small case, you could get something like the Doepfer LC3. This would get you 3U / 84hp case for about 240€. Or if a barebones 19″ rack skiff is more your thing, then perhaps get TipTop Audio’s Happy Ending Kit for ~160€.

TipTop Audio Happy Ending kit
My Options
Looking at which bits of other gear I’d like to have in close proximity of my eurorack modules, I ended up with a total size of 7U of 19″ rack modules, plus the TTSH and 1601 sequencer. At this point I already had enough eurorack modules to fill two 3U 84hp cases, with more builds underway. Using 19″ rack units as a yard stick, I would need at least 16U rack space to leave some room to expand (= 3U 84hp) and some flat surface (= table?) for the non-rack gear. So I concluded that my options would either be to..:
- Build a medium-sized desktop eurorack case and have my wheeled rack trolley (10U) next to it. Or
- Buy a new 19″ rack trolley (like eg. the 20U KM42020 off Thomann), then make a few medium-sized rack cases for eurorack modules (using, say 3* A100 DIY Kit). Or
- Extend my existing rack trolley with, say, another 10U. Or
- Build a custom desktop case, possibly including some slots for 19″ rack devices. The existing rack trolley comes in a handy extra if needed.
Options 1-3 each had issues with either usability or expanding setup, and esp. option 2 would’ve also been quite expensive. So I went on to explore what I could achieve with option 4.
Build Features
Talk about taking the long road to reach a simple conclusion; all of the above lead me to determine what I need is a big desktop eurorack case.. Job well done I suppose :P
To have some concrete dimensions I then took some measurements of existing gear and thought about ways I would / could like to set them up. This left me with the following feature list:
- Case needs to have plenty of room to expand (so that I don’t need to build a new case any time soon).
- There needs to be room for at least 2U of 19″ rack modules.
- Top shelve needs be deep enough to fit my TTSH on top (~20cm).
- Case should be installable both on tabletops and keyboard X-stands (the Quicklok kind). As in, case needs to be wide enough.
- Overall depth of case should not exceed 40 cm much.
- Overall height of case should not exceed 30 cm (to fit under 2nd tier of my X-stand).
Now once again looking at what’s on the market I came across the Doepfer Monster Base, which has 6U 168hp (= 336hp total) space for modules. This looked pretty much like what I was after (minus the 19″ rack slots) so I decided to use it’s design as starting point.
The Doepfer Monster Base
After some revisions, I ended with drawing where the two 19″ rack units sit side by side at the very bottom. Above these is 6U 200hp space for eurorack modules (1 meter wide Gie-Tec rails), and finally there’s a ~20cm shelve on top to stack gear on. Here’s that design, with all dimensions in millimeters (mm).

Monster Base, side and front views.

Monster Base, middle support.

Monster Base, inner side panels.
Of these case parts, I initially added the middle support only because the rack rails for 19″ modules needed a sturdy mounting point. But the part turned out handy in other ways too. I’ll save writing about these to the actual build post.
For a while I was also toying around with a design which had a hinged cover to protect eurorack modules during transit (Doepfer Monster Base has a detachable one). This cover could’ve also housed one or two 19″ rack modules and, once flipped open, these modules would then sit on top of the Monster Base, front panel facing towards the user. But after giving this design a couple of days off I realized, that perhaps it would be better to dumb down things. You know, keep the build simple and make one without the cover.
One important thing to notice: Please keep in mind that the dimensions in the above drawings are not exactly what I ended up using.. Eg. getting your build dimensions right down to hundreds of millimeters only using hand tools = totally pointless. Also at the time of drawing these I hadn’t exactly decided what materials (and at which thickness) I would use.
There’s always some winging involved when you get down to the actual build. I’ll follow up with that some time soon! :)

Trackbacks / Pingbacks