
Unnu -inspired tv stand / media bench
Need a clean & elegant looking tv stand that will hide away all the equipment yet allow remote controllers to work through doors? Then check this out :)
Ever since I came across danish Unnu‘s wonderfully minimalistic tv stands, anything even slightly similar became a instant “must have” on my want-list. Biggest problem here: for me the nearest Unnu retailers are located ~400 km away in Stockholm, Sweden. Not exactly mail order stuff these tv stands..

Unnu tv stand minus the tv. Photo by Unnu.
.. so you might guess I was pretty excited when I stumbled upon Henrik’s Unnu inspired Bestå hack at Ikea Hackers. Now here’s a DIY project I just need to do!
Summary of sorts
What the build basically boils down to, is to modify a set of Bestå shelf extension units to allow A) their doors to fit between the top & bottom parts and B) cut a hole to each door and cover them with thin fabric.
I chose to go about the build using two 1200*380*400 millimeter (mm) extension units and four black-brown Vara doors with push latches. For the fabric, I bought two packs of DLS’ 1200 * 900 mm black speaker baffle cloth. All these parts added up to roughly 200 euros.

Henrik’s approach of not trimming down the side boards.
Instead of modifying the Bestå extension unit by only moving the side boards backward (like Henrik did), I chose to trim away the excess part going over the rear edge. Bothering with this minor detail is well worth the end result in my opinion: Leaving the boards untrimmed badly distorts the clean rectangular shape.
The Bestå chipboard doors measure 16.2 mm thick. I decided to move the side boards back by 18 mm to have a few spare millimeters for the fabric. During assembly this distance turned out not to be the most ideal, but things worked out even so. I’ll return to this in a bit.
I also was planning to wall-mount the tv stand, but the idea was shot down immediately after unboxing the Bestå parts for taking measurements. The amp (nor the subwoofer) just didn’t fit inside fully!

Amp just barely fits inside with no room for cables. No wall-mount for you, mister!
Cutting stuff
Using a decent table saw, trimming down the side boards & doors is a snap and end results clean:

18 mm sliced off the side board..

.. and 60 mm (divided by 2) off a door.
The doors measure 380 mm tall whereas the inner height of the extension unit is 320 mm, so that’s 30 mm to be removed per edge. For the cutout I used the following dimensions:

Bestå Vara door, all good for the fabric.
I also spray-painted all the cut edges black, just in case the plain/cut chipboard would show through the fabric. I didn’t have it at hand at the time of cutting and wanted to play safe, simple as that :)
Assembly
Both the top & bottom boards only need modification as little as moving back the holes for the screw-on metallic assembly pegs (or whatever they’re called) by at least the door thickness. So:

Them pegs relocated.
Like said I chose to move the boards back by 18 mm, and this proved a tricky distance because it made precise hand-drilling of holes impossible. 18 mm was just enough to move the hole center to the edge of the narrow slot (which holds the back board) towards the back end. To try drilling on my exact marked spot just made the drill bit center on the slot instead.
End result was, that I had the front peg holes moved back by 18 mm whereas the rear holes moved by 19 mm (or perhaps 20 mm). This made assembly require a bit of excess hammering in order to fit everything together. Lucky for me, (at least this particular) Ikea design allowed for a little slack in its dimensions, and thus the ~1mm difference between peg centering wasn’t critical as to prevent assembly altogether.
Long story short: If you’re building one, make drilling easy and move the holes back by 19 mm.

The little things that make a difference: Felt furniture stickers for the feet.
As for the doors, I had no previous experience of stretching fabric over a frame. Youtube to the rescue:
Starting with one staple on each edge, I worked my way towards the corners one staple pair on opposite sides at the time. First the horizontal and then the vertical edges.
Instead of cutting the corners of the fabric like in the first YT clip, I used Cedar Lee’s technique from the second one. On the hinged edges, I folder some of the fabric under the hinges.

It’s a start: One staple on each edge..

.. horizontal edges somewhat done ..

.. and the finished hinged edge.
Other stapling technique (or the lack of it)..: Well lets just summarize that I used a lot of staples and didn’t bother spacing (or lining) them up in any clean way. A good guess is, Unnu has these door fabrics cut and installed in a way more professional looking style ;)
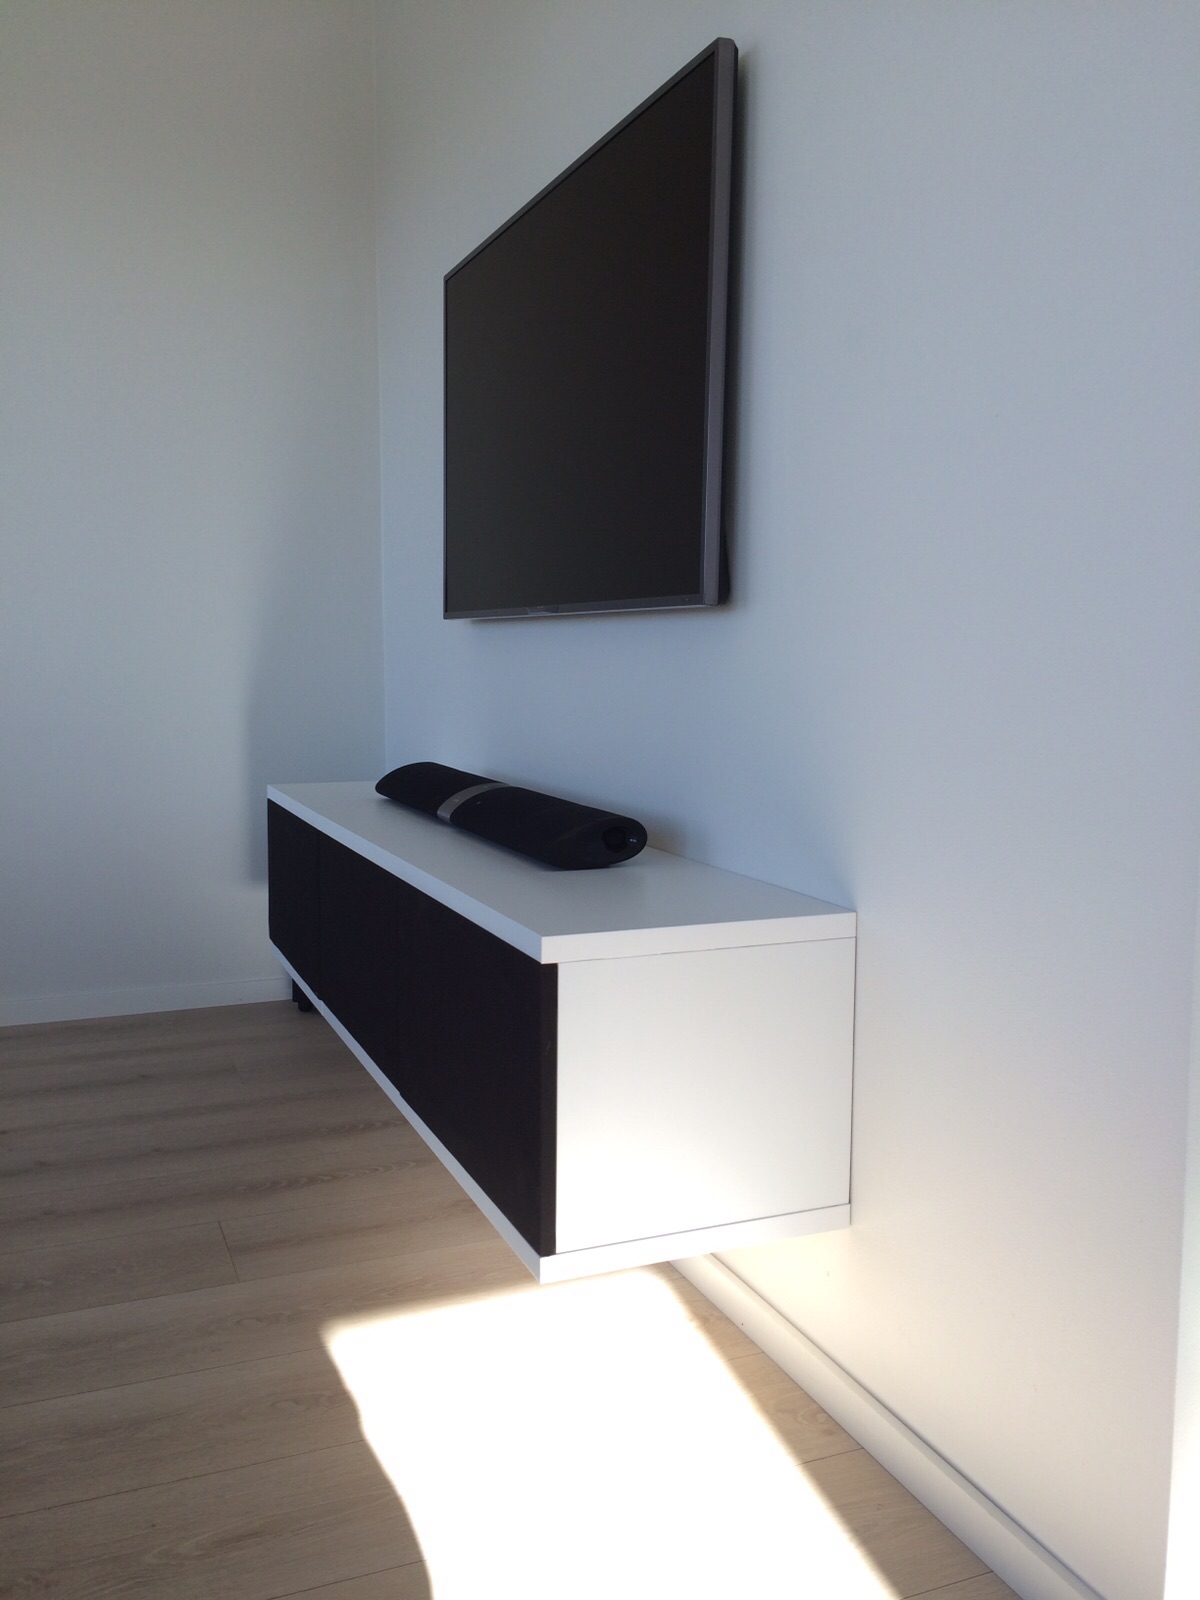
With the side boards cut, peg holes moved and speaker cloth installed, the rest is just assembly according to Ikea’s instructions. Final work stage: Install all the electronic hardware, kick back on the sofa and spend a while admiring the new tv stand <3

The end results feat. my CD Lamp build :)

Door open..

..and door closed.
24 responses to “Unnu -inspired tv stand / media bench”
Trackbacks / Pingbacks
- - 01/12/2015

Very nice result! Thanks for sharing the details of your build.
This a great post. I am using the Ikea Borgsjo TV bench and I will do up the door following your post. Great stuff.
Thanks! Do post a link if you put some photos online :)
Just bought the parts for this build now – but upon drilling my first peg holes I encountered a potential problem. It seems like the only thing the pegs would screw into is a thin (5mm) sheet since there is no chipboard in the core 19mm back. Do you think this would make it to weak to wallmount it? Did you do anything else to reinforce the joints?
Awesome build btw, I going to buy Unnu until I saw this post :)
//David
Yeah I think that as-is this modification is structurally too weak for wall mounting. I spent a while thinking about how to work around the problem, but gave up on it as anyway my amp & subwoofer would’ve not fit inside the stand had it been wall mounted. So nope, didn’t reinforce the joints in any way.
Replacing the bottom sheet pegs with long countersunk wood screws and drilling them through the bottom sheet might be one approach. If there’s some honeycomb structure inside the sheet, maybe filling up the honeycomb / hole where the peg goes (and then drilling a new guide hole for the peg) might be another one.
For wall mount you’d probably want to support the stand from both top and bottom sheets. The latter should have support from underneath so that the weight rests on the support. Running some 1*2 inch strip board against the wall might work well here; make the strip a bit shorter than the width of your stand so as to hide away its ends.. and perhaps paint it with a color that matches your wall.
Would be cool to see how you decided to go about your build, so do post photo links if/when you have them!
Thanks for the reply!
Just went to the store and bought some decent wood glue to add between all the joints on final assembly, I guess anything helps. Using countersunk screws at through the original peg positions in the bottom sheet sounds like a good idea, I think try that first (in addition to a strip board running along the bottom once I hang it up).
I’m currently stuck sanding one of the doors, I managed to mess up slightly so some adjustments were needed ^^ I’ve only got a jigsaw to work with, those things doesn’t want to go straight.
I’ll make sure to post some pictures as soon as I get a bit further along. :) Again, thanks for the reply and helpful input!
//David
I promised pictures, here’s one of the current progress :)
Currently I have one unit completed, and the other just needs assembly / finishing touches to the doors. I’ve put the wall hanging on hold until I’m sure it’ll hold my amp and gaming stuff. (feat. my DIY ambilight, I’ll make sure I take the next picture at night so it can shine some more :D).
//David
many thanks for your inspiring article. I too am interested in using the besta unit. Do you think it is OK as a freestanding unit, or must it be screwed to the wall to stop it tipping over or collapsing under the weight of the Tv. I find it odd that the instructions require it to be screwed to the wall even if is is standing on its own feet. did you screw yours to wall?
Yeah absolutely. When laid horizontally on the floor like mine, I can’t see it tipping over ever. It’s just the sheer weight of all the gear & books that makes it impossible. Vertical installation might be a whole different thing but that goes totally against the design, like how the doors operate etc. :)
Mine isn’t affixed to the wall in any way, there’s about a 6cm gap in-between. This is because the subwoofer and amp cabling protrude from the back side and prevent installation immediately next to the wall.
Looks amazing. Did you cut out room for your HIFI in the back plates? I have a huge amp :P
I left them out altogether :)
Hi Arto and everybody,
you’ve inspired me, and it came out great!

(can everybody see the pic?)
I did hang the units (2 2-door units + 1 1-door unit) without any problems. I used the standard plastic ‘cubes’ on my reinforced concrete wall, and hung the TV with an Ikea mount. No back panels are installed. The 1-door unit actualy has a drawer, so that I can store all my turntable gear in (record brush, stylus brush,..)
Also, I drilled lots of 60mm (2.3″) holes on the inner panels, so that I can run all the cables through.
At left side, I hung 2 ikea Lack cabinets, because my 2 channel amp was way to deep. I fittend the tuner there just for the looks of it. The height is exactly the same, so this gave a nice result.
All I need to do now is hide a few cables (TV’s power cable, and the cables between the Bestas and the Lacks) and enjoy it :)
Thanks Arto for the detailed instructions!
Erik
It seems the picture is upside-down. Weird. Try again :)
Right, well, I flipped the Image, saved it, uploaded it to dropbox with a different name, but it didn’t help. Fortunately my tool skills are better than my internet skills.
Hi,
Many thanks for the guidance in this post. I decided to go with light gray rather than black as panel textile. I am really pleased with the end result. However, I would really rather have it mounted to the wall as opposed to standing on the floor.
Pics of my setup:
https://www.dropbox.com/photos/shared_space/Dat8N9eN6dHd1RP
https://www.dropbox.com/photos/shared_space/n6FMYKRqYaYdmll
After having cut and moved the vertical parts back by a few cm I guess that the back panels are out of question? This leaves the unit quite unstable to say the least. I therefore wonder how much weight the units could hold if mounted to a brick wall? I would need them to hold at least their own weight plus 20-30kg. Do you guys think this would be possible?
Also if you could explain in more detail with pictures how the wall mounting could be done in a good way that would be greatly appreciated.
The television set is just a temporary solution and won’t be standing on the unit later.
Thank you on beforehand.
//Christian
The light gray doors look nice! I’m thinking it might be visually better-lasting than black in some cases. As it has turned out at least for me (= household with two kids), the black fabric tends to collect some visible dirt over time near the door corners with push latches. Kids seem to really like playing with the push-to-open doors :)
Anyway.. Using the back panels depends entirely on the depth of the gear you wish to store inside the unit. For me using them was absolutely impossible. Below is a 15-minute MSPAINT sketch of how I assume the wall mount might succeed. I mentioned this design some comments up. For this sketch I also added the optional L-brackets (green) round the back: These might make the cabinet a bit more sturdy in case the it feels unstable without the back panels.
Idea is that the 1*2 inch wood strip carries most of the weight, and the entire back side of the cabinet needs to be as close to the wall as possible. The wider the gap in-between, the more stress will be applied to top edge L-brackets (and likely the entire cabinet structure). When the cabinet is all against the wall, the latter will provide some structural support to the former too.
The cabinet isn’t affixed to the 1*2″ strip by anything else than the combined weight of your gear and the cabinet. If you still can pull the bottom edge of a installed cabinet off the wall (with the 20-30kg of gear in it), then affix the two together using a few screws. If you need to run cables past the top board (eg. for a tv) I recommend rather drilling a through-hole on the top board rather than leave the cables squished between the back edge of cabinet and the wall. You can make the through-hole visually cleaner by adding a cable hole cover such as this.
I would also paint the 1*2 strip to match the color of the wall and have it maybe 6-10cm shorter than the cabinet on both edges (so 12-20cm shorter all in all). This way it’ll be less visible from the sides esp. if cabinet is installed higher up (say +40cm off the floor) on the wall. I’d also paint the screws used to affix the strip to the wall. If you install the back panels then spacers the size of the gap between panels and wall must be installed. This will provide support for back panels, so that when the cabinet is affixed on the wall the L-brackets won’t bend (or even break) the back panels.
Note that I have no idea how the honeycomb structure is laid out inside the side panels: I briefly tried knocking/tapping through the ones on my cabinet and they sounded like solid particle board at least towards the edges. However it could well be that affixing the L-brackets is quite impossible if there’s nothing inside the panels for the screws to grip to.
If you try this design or find some other nice solution for the wall mount, please post the design here. I think it’s a topic that would be of interest to many!
Thanks for your great post and detailed explanations.
Here’s my setup, wall mounted. I used totally 5 L brackets, Superfix glue (bought from Monter) between top plate and side/mid plate
Also, some screws from bottom plate and into side/mid plates.
Fault picture uploaded.
Thanks for the photos, looking great! :)
What size is this? Is this still from bestå?
Yep it’s Bestå, combines two of 120cm wide so 240cm wide total
What kind of fabric did you use ?
Hi, it reads in the blog post ;)